Removing Backgrounds from Images
If you load a picture to use as a drag a copy symbol, chances are it has a solid background. That means it won't look great if it's meant to overlay a background image.

What you really want is for the background of the picture to be transparent. Usually, this means having to resort to a dedicated art package to delete the background. However, if you're lucky, you might be able to do the job in ActivInspire.
Making a Background Transparent
If you're really lucky, the background that you want to get rid of is already one colour, and very different to the rest of the image. In that case, do the following:
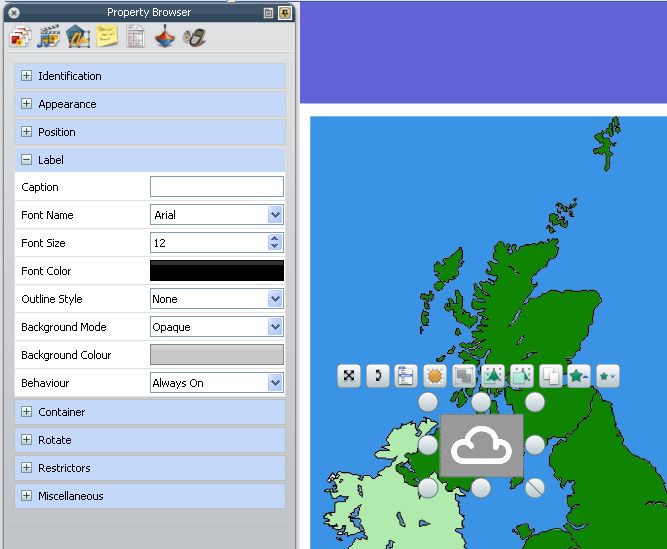 Click once on the picture to select it.
- Press F9 on your keyboard to open the Property Browser.
- Locate the Miscellaneous property (at the very bottom) and open it by clicking once on the + symbol.
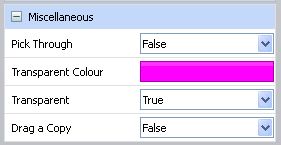
- If the Transparent property is set to False, click on the dropdown list and select True.
- Click on the coloured rectangle (which is probably currently a loud pink) next to Transparent Colour. A palette appears.
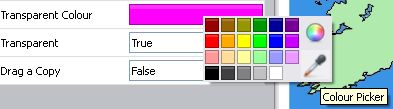
- Click on the pipette icon (the colour picker).
- Now move the mouse over to the background of your picture. A magnified window will show you a larger view of the area around the mouse.
- If the magnified view reveals that your background isn't all one colour after all, you'll need to follow the steps in Giving Backgrounds a Solid Colour below.
- Otherwise, click once on the background colour.
- You should instantly see the background has vanished from your picture. If not, you'll need to follow the steps in Giving Backgrounds a Solid Colour below.

Giving Backgrounds a Solid Colour
 If you've discovered your picture has a background made of different shades (you'll be amazed how many variations of "white" can be hidden in a picture), you need to do the following before going back to the solution above:
- Select the Fill tool
 .
. - Pick a colour that contrasts with all / most of the colours in the picture.
- Click once on the background of the picture to fill it with your selected colour. You'll still see a little bit of the original colour showing through.

- Carefully move the Fill icon to an area of the remaining background colour. It might help to zoom in. Hint: it's the tip of the drip from the Fill icon's paint can that has to be in the correct position.

- If you make a mistake and end up filling in part of the picture you wanted to keep, just select Undo (Ctrl+Z).
- When you've done as much as you can stand, try making the background transparent using the solution above.
The result probably won't be perfect; you'll still have a few spiky bits sticking out around the edges. You can sometimes reduce this by adjusting the size of the image (usually by making it a little smaller).